• Home
  • Blog
  • Shop

Thomas Campone Photography

Chicago based travel photographer

  • Home
  • Blog
  • Shop

Reader Question - Photography Gear

I recently received this email from a reader and I thought a few of you may have a similar question so I decided to post the response. I'm always happy to answer questions from readers so keep them coming! 


Good Evening,

My name is Kristine and after watching Tales By Light you have inspired my to advance my skills in photography. If you don't mind me asking, a had noticed that you use a Canon EOS camera. What type to you usually use (not the underwater fish lens)? Wanted to know if you could give me some feed back in regards to what camera preference you would use? I usually take landscape, portrait and some action shots. Not too interested in the video mode, more for the camera. Your advice would be greatly appreciated.
Thank you,


Kristine,

Thanks so much for reaching out. I'm glad you saw my recommendation and enjoyed the show. I'm actually a Sony shooter. For years I was a Nikon shooter but about 3 years ago I switched to Sony due to the size and image quality. My current camera bag is filled with prime lenses (lenses that don't zoom). I find that the image quality and size/weight combo is hard to beat. It can be a pain to always swap lenses but my opinion it is worth it. I currently own a 18mm f2.8 Zeiss, 35mm f2.0 Zeiss, 55mm 1.8 Sony/Zeiss, 85mm f1.8 Zeiss and a 135mm f2.0 lens. If you are looking for an all purpose lens most of the manufacturers make a 24-105 f4.0 which is a good all around lens. There are other options with more range but I feel that they are too slow (aperture) for what I like to shoot. I hope this helps and let me know if you have any other questions.


tags: Gear
categories: Uncategorized
Tuesday 12.27.16
Posted by Thomas Campone
 

Food Photography: Steamed Mussels and Cappellini Pasta

I love seafood - and mussels are no exception. My wife and I recently visited Mariano’s Fresh Market to check out the latest local craze in grocery shopping in Chicago; it did not disappoint. The seafood bar had a variety of selections and we decided to buy a bag of fresh mussels. We’ve never cooked mussels at home but was recently inspired by an amazing mussels dish at Acadia restaurant in Chicago and decided to give it a try. The hardest part is cleaning them, but it’s worth the work! Mussels

Campone’s Steamed Mussels Recipe: 1 bag of mussels (about 2 pounds) 1/3 chopped white onion (or 4 shallots) Extra virgin olive oil 6 cloves garlic, minced Red chili pepper flakes Chopped flat italian parsley 1 cup white wine (something you would drink; I like Sauvignon Blanc or Chardonnay) Salt and pepper Juice of 1 lemon

Directions: Soak mussels in water for 15 minutes to remove any sand. Drain and clean the mussels, scrubbing them with a vegetable brush under cold water. Pull off the “beards”. Discard any that are not tightly closed or any with broken shells. In a deep saute pan, heat the olive oil on medium-high heat. Add the onions and cook for about 5 minutes until softened. Add garlic and cook for a minute without burning the garlic. Add a pinch of red chili pepper flakes and stir. Add a good pinch of chopped parsley, the wine and salt and pepper. Stir and bring to boil. Add the mussels, stir, cover with lid and let cook for 8-10 minutes until mussel shells have opened. Discard any mussels that don’t open. Squeeze juice of 1 lemon into pan. Pour mussels with sauce into large bowl. Serve immediately with some crusty sourdough bread to sop up the juice, and of course, a chilled glass of white wine. Cheers!

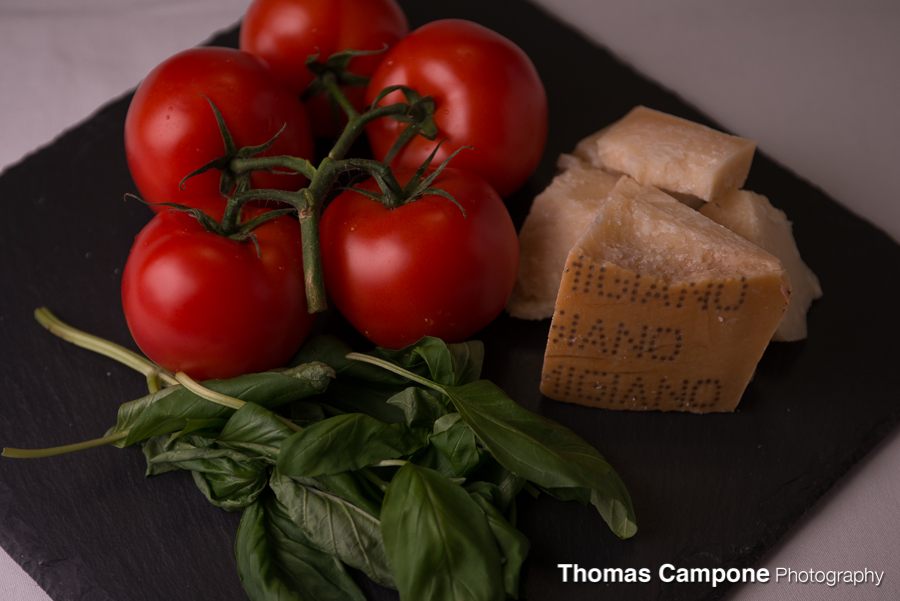
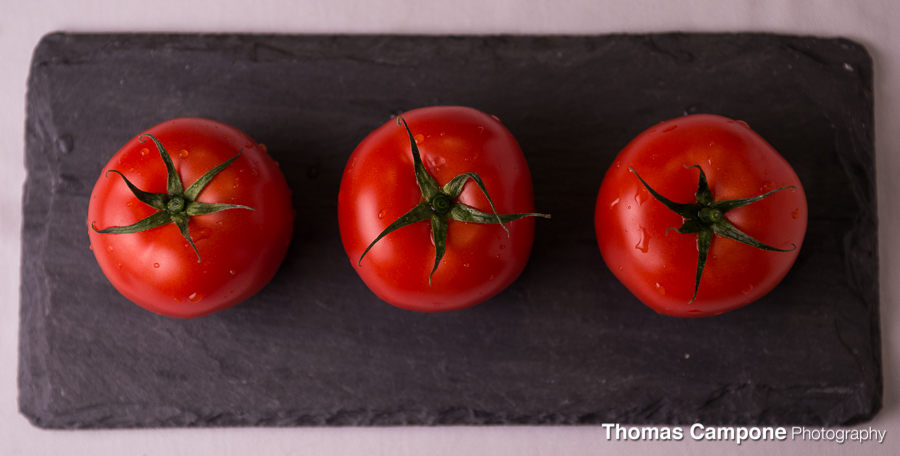
Being Italian has certainly rubbed off on my wife. One of her favorite dishes to cook on a whim is pasta. Regardless of what we have in the refrigerator or pantry she can always find enough ingredients to make a simple, delicious pasta dish. Here is one of our favorites: Cappellini Pasta with Tomatoes, Mushrooms and Basil. I love the colors of fresh tomatoes. I used a bright, colorful background to bring out the colors of the dish. A simple white bowl really shows off the dish well and is a nice contrast with the bright colors.

Grape Tomatoes

Cappellini Pasta


Cappellini Pasta

Campone’s Cappellini Pasta with Tomatoes, Mushrooms and Basil Recipe:

Two boxes fresh grape or cherry tomatoes (use both red and yellow for color), rinsed 10 large white button mushrooms, thickly sliced Extra virgin olive oil 6 cloves garlic, minced Red chili pepper flakes Juice of 1/2 lemon Salt and pepper Parmigiano Reggiano, shaved Fresh basil leaves, sliced chiffonade

Directions: In a saute pan, heat olive oil and add sliced mushrooms. Stir only occasionally to let brown on all sides, about 10 minutes. Once browned turn off heat and set aside. Cook cappellini pasta al dente. Heat olive oil in a separate large saute pan over medium-high heat. Add tomatoes and cover with lid for a few minutes. Stir and cook another few minutes, until a few tomatoes start to brown and open. Add the sautéed mushrooms, garlic, pinch of red chili pepper flakes and salt and pepper, stir and cook for about a minute to let garlic soften. Add al dente cappellini pasta straight from the pot to the saute pan. Add juice of 1/2 lemon for a fresh kick. Toss together and serve in large bowl, topped with shaved parmigiano reggiano and fresh basil. Mangia, mangia!

tags: Cappellini Pasta, Chicago, Food, Mussels, Photography
categories: Uncategorized
Saturday 04.13.13
Posted by Angie Campone
 

Food Photography: Caprese Salad and Cilantro Garlic Shrimp

I am excited to have recently discovered the world of food photography. I have always enjoyed food and consider myself a “foodie”, which is not hard to do living in Chicago. There are endless restaurants to try, new restaurants popping up weekly, food and wine festivals, and world renowned chefs from Chicago are getting more press than ever. In the spirit of feeding my passions for photography and food and my wife's passion for cooking, I have immersed myself into several food photography sessions to capture some of my favorite subjects (of course enjoying them after the shooting is done). Here is some of my latest work. Being of Italian heritage, I love simple ingredients that also bring complexity and depth. Tomatoes straight from the vine, chunks of aged parmigiano reggiano and fresh basil leaves go well together - both on a dish and in front of a camera. After a few shots of the ingredients themselves we made a simple caprese salad:

Tomatoes, Cheese and Basil

Tomatoes

Caprese Salad

Campone’s Caprese Salad Recipe: 2 tomatoes from the vine 2 medium balls fresh mozzarella Fresh basil leaves Extra virgin olive oil Salt and pepper to taste

Directions: Slice tomatoes and mozzarella into thick slices. Layer tomatoes and mozzarella alternately on plate. Drizzle with extra virgin olive oil. Sprinkle with salt and pepper to taste. Roll basil leaves and slice into thin strips. Sprinkle basil onto salad. For an extra kick, drizzle with balsamic vinegar.

Next, a delicious, easy appetizer (perhaps also a blend of my Italian and my wife’s Mexican heritages!)...Cilantro Garlic Shrimp.

Cilantro Garlic Shrimp

Cilantro Garlic Shrimp Campone’s Cilantro Garlic Shrimp Recipe: 1 pound large shrimp, peeled and deveined 4 cloves garlic, chopped Extra virgin olive oil Red chili pepper flakes Fresh lemon juice Cilantro (may substitute Italian parsley) Salt and pepper to taste

Directions: Heat 2 tablespoons of extra virgin olive oil in saute pan on medium-high heat. Add chopped garlic and pinch of red chili pepper flakes to oil and stir for 20 to 30 seconds, making sure it does not burn. Add shrimp to pan and let cook for 2 minutes. Flip and cook another 1 minute or until all shrimp are pink and cooked through. Squeeze juice of one lemon into pan. Stir. Turn off heat. Sprinkle salt and pepper to taste and top with chopped cilantro. Toss and serve immediately.

tags: Caprese Salad, Chicago, Food, Photography, Shrimp, Tomatoes
categories: Uncategorized
Monday 04.08.13
Posted by Thomas Campone
 

Product Photography with Beaulieu Vineyard Wine

As a photographer, at times it can be difficult to make yourself get out and shoot. Sometimes you are inspired and sometimes you aren't. I find that my best shoots are inspired by things that I love.  A recent shoot with one of my favorite wines is a great example.  First to set the stage: it was a cold wintery Sunday.  My wife was heading out for some girl time and I hadn't been out shooting for a few weeks .  I caught a glimpse of some wine corks that we had been saving. I  love to capture short depth of field and thought it might be fun to grab a few corks and shoot. Beaulieu Vineyard

Beaulieu Vineyard

Next thing I knew I had a pile of corks on my kitchen counter.  I love shooting food so I started staging the corks setting them up in rows and laying them down.  The shoot was unfolding before my eyes.  I grabbed one of my light stands and booms and grabbed a dark grey bath towel as my backdrop.  I snapped a few photos to see if I could get the light to drop off behind the corks.

I then grabbed another light stand with my small light box and my speed light.  I set this up camera right shooting downward at a 45 degree angle at the corks and the bottle.  A few snaps later and I had the speed light dialed in to a setting that I liked.

Beaulieu Vineyard

The shot was coming together but something was a little off with the bottle.  I decided to grab another speed light and throw on a homemade snoot. I put this on another light stand and put it about 6 feet in the air and shot down at a 45 degree angle at the bottle.  This was the missing piece for the shot.  With this rim light I got a great outline of the bottle and the wine glass in the background.

Beaulieu Vineyard

I then worked through different setups with the corks and the bottle.  I moved the bottle to the front, then the back.  I kept the corks up in a row, then I laid them down.  I tinkered around with the light but kept it mostly the same with little variations here and there.  After about 90 minutes of set up and shooting I was ready to put it all away and edit.

It's hard to get out and shoot in the winter months especially if you live in a city like Chicago but through this shoot I was able to work on my product portfolio with a product I love.  I was also able to escape the winter, even if only for a few hours.  If you are considering getting into product photography or need something to do in the winter months consider setting up a micro studio in your house and getting yourself a few speed lights.  The entire setup here took up no more than 3 feet by 3 feet (not including shooter space).

Oh, and if you want to enjoy some delicious wine, check out Beaulieu Vineyard's website, I highly recommend it. Cheers.

Beaulieu Vineyard

Beaulieu Vineyard - Napa Valley CA

Beaulieu Vineyard - Napa Valley, CA Beaulieu Vineyard - Napa Valley, CA

Beaulieu Vineyard - Napa Valley, CA

Beaulieu Vineyard - Napa Valley, CA Beaulieu Vineyard - Napa Valley, CA

tags: Beaulieu Vineyard, Chicago, Product Photography, Softbox, Speed Lights, Wine
categories: Uncategorized
Tuesday 03.26.13
Posted by Thomas Campone
 

What Inspires You....

Photography can be an interesting profession.  If you are a creative shooter as most of us are, at some point you run out of ideas of what to shoot. I can see this being an issue whether you shoot landscapes, street photography, or in a studio setting.  After a certain amount of time you start to feel like you've shot the same shot, the same setup, the same subject.  The question is how do you keep it fresh?  How do you stretch your abilities and push yourself into new creative endeavors? I think the answer varies for most people but very often includes personal projects.  The goal is to shoot the things and projects that you like and you find interesting.  It's hard when you are in the same location to keep it fresh but even if you can't travel to a new location do something different.  Model Mayhem is a great site that matches models with photographers.  Most models work for free in exchange for copies of the photos you take.  If you are in a rut hire a model and shoot for an afternoon.  Get out and go have some fun. This time of year is especially tough because it's so dark and so cold.  It can be difficult to be cooped up all winter but consider moving inside and setting up a small macro studio.  You'd be surprised how interesting some of the small things around your house look with a macro lens.  Even if you don't have a macro lens pick up a 50mm f1.8 lens.  It's not quite a macro lens but it works fairly well.  I've got a nice little set up that allows me to shoot models in my house.  I bought a 9 foot white paper roll from Calumet Photo and a backdrop mount that I can put up in about 15 minutes.  It's a great way for me to get my fix in the winter months.  The set up was relatively inexpensive and I can buy more paper and different color paper if I decide to go that route.  The set up also works great for pets too.

I love Google+ because there is a vibrant and flourishing community of photographers that share a ton of work.  Yes Facebook is the 800 pound gorilla, but Google+ arguably gets better interactions and feedback than Facebook. This is especially true now that Google+ rolled out communities. Google+ communities are a great way to participate in a semi-private circle where only the members can interact.  You can have multiple treads with different topics such as critiques, discussion or gear. I currently participate in 4 communities (Long Exposure Photographers, Chicago Photographers, Landscape Photographers, and Sports Shooters).  I've found that in these communities the interactions and feedback is even better than the general Google+ feed and you can hone in on particular topics that interest you.  Communities are a great way to get your work out there and share it with the photography world.  You can find pretty much anything you are looking for from sports shooting to food photography and everything in between. I find myself spending 10-15 minutes a day just looking through all the great shots that are in my communities and my Google+ feed.

I also have found that there are some great e-books out there on photography that help inspire my personal work.  I personally love Digital SLR Magazine I know it's not an e-book per se but it is available in iTunes and I tend to read it on my iPad.  I also love to read Chicago Social Magazine.  They have great photographs and product shots that get me thinking of what I can shoot around the house and how I can stage my next model. Some of my other favorites come from Flatbooks which I believe is owned by Trey Ratcliff. Craft and Vision also has some great e-books that teach you the technical skills you will need but also offer some inspirational images.

One of the websites that I read pretty much daily is FStoppers.  They put up some great articles on the technical aspects of photography and do a lot of great behind the scenes (BTS) videos with experts from all over the industry.  Some of my favorites are behind the scenes videos of Vogue shoots or some of these extreme sports shoots.  It's definitely a site worth checking out and visiting often.

I think the final key to growing and progressing is shooting when you have the muse.  For all your Timothy Ferris followers out there you know what I'm talking about but for those of you who haven't read The 4 Hour Work Week the muse is shooting when you feel inspired and in the mood to do something.  It's the worst when shooting becomes a hassle or a job that you don't like.  If you are like me this is the hardest part of being a photographer because I feel that if I'm not doing something that I'm not moving forward.  When the muse is around I tend to do my best work and feel the happiest about what I'm doing.  Hope this post gave you a few ideas on how to keep motivated this winter and whenever you are feeling in a rut.  Let's hope for an early spring so we can all break this house arrest and get out and shoot.

tags: Chicago, inspiration, Models, Muse, Photography, Studio Photography
categories: Uncategorized
Friday 01.18.13
Posted by Thomas Campone
 

Boots with Spurs

Boots with Spurs

Boots with Spurs

I recent was contacted by the Chicago band Boots with Spurs about shooting some new band images for their website and an upcoming magazine article for Chicago Music. I jumped at the idea of getting to put my spin on the classic music images that I grew up with. If you've ever listened to the most recent Boots with Spurs album you know that these guys have a very rock style with a lot of energy.

I spent some time before the shoot combing the Rolling Stones magazine website to get some inspiration. The band picked a local bar in Bucktown for the shoot location. The style of the bar was a perfect fit for the band's style.

We set up the first couple of shots in the VIP section under a really unique chandelier. I decided to have the band sit across from me on some stools we found. I first started shooting head on using two speedlights to light the band from both sides. I used a grid on each speedlight to shape the light and give it a harder look. I was trying to avoid over lighting the room.

Lighting Diagram VIP

Lighting Diagram VIP

Boots with Spurs - VIP

Boots with Spurs - VIP

After I shot the band from the front I decided to shoot from the sides just below and above the speedlights. This gave me some good hard light and quick falloff so that the rest of the room stayed dark.

Boots with Spurs - VIP 2

Boots with Spurs - VIP 2

After we shot in the VIP room we headed out to the bar. The bar had a great wall of liquor that made for a great backdrop. I had the guys move out the stools that were in the way and I set up one speedlight high and to the right of the band and one speedlight behind the bar facing the band. This gave me a good rim light around the heads of the band.  I worked with them on a few different poses but ultimately the shot that was the best was the shot after one of the guys cracked a joke.  Everyone quickly let down their guard and they looked like they were just hanging out.

Lighting Diagram - Boots with Spurs - Bar

Lighting Diagram - Boots with Spurs - Bar

Boots with Spurs

Boots with Spurs

A few weeks after the shoot the band asked me to come to their show and shoot a few more photos.  I brought my Nikon 28-70 f2.8 and headed out. Thanks to the performance of my D800 I can shoot at extremely high ISO's so I turned my camera to the manual setting, set my ISO to 2000, shutter speed to 160, and aperture to 2.8 and I was ready to roll. Check out the pictures below for the results.

Boots with Spurs - Bottom Lounge - Chicago

Boots with Spurs - Bottom Lounge - Chicago

Boots with Spurs - Bottom Lounge - Chicago

Boots with Spurs - Bottom Lounge - Chicago

Boots with Spurs - Bottom Lounge - Chicago

Boots with Spurs - Bottom Lounge - Chicago

Boots with Spurs - Bottom Lounge - Chicago

Boots with Spurs - Bottom Lounge - Chicago

Boots with Spurs - Bottom Lounge - Chicago

Boots with Spurs - Bottom Lounge - Chicago

Boots with Spurs - Bottom Lounge - Chicago

Boots with Spurs - Bottom Lounge - Chicago

Boots with Spurs - Bottom Lounge - Chicago

Boots with Spurs - Bottom Lounge - Chicago

Boots with Spurs - Bottom Lounge - Chicago

Boots with Spurs - Bottom Lounge - Chicago

Boots with Spurs - Bottom Lounge - Chicago

Boots with Spurs - Bottom Lounge - Chicago

Boots with Spurs - Bottom Lounge - Chicago

Boots with Spurs - Bottom Lounge - Chicago

tags: Boots with Spurs, Bottom Lounge, Chicago, Chicago Music
categories: Uncategorized
Sunday 12.30.12
Posted by Thomas Campone
 

Las Vegas

6 days in Las Vegas...yes, you read that correctly. I just came back from 6 full days in Las Vegas and the miracle of the trip was I actually made it back in one piece. The Bellagio Las Vegas and The Beatles

The following day after my Napa trip my wife had a business trip in Las Vegas so I figured I'd join her.  So much time in Las Vegas yet so little time to actually shoot. I don't know how travel photographers do it. It's hard to show up in a city even if you have been there before and get a portfolio image. I didn't have a car so Red Rock was out. I called the Bone Yard and they were sold out for the week. What's a man to do? I thought about a helicopter tour of the Grand Canyon but then a review from another photographer put the kibosh on that idea.  So I decided to shoot the strip. I figured the skywalks and light trails would have be interesting with the right composition, as well we the tops of the Eiffel Tower and Stratosphere .

Treasure Island Las Vegas

Unfortunately, I was stuck with the same gear from my Napa Valley trip and that meant I had my Tokina 11-16 f2.8 instead of my Nikon 80-200 f2.8. That lens could have been put to good use in Las Vegas.

I decided I was going to walk almost the entire strip over the course of a couple nights.  I would bring my tripod and try to capture the scale of the buildings on the strip and highlight them with light trails and blurred people. As you can imaging some people left me alone, while other drunk people and human-sized Muppet characters insisted in photobombing my shots.

Las Vegas from the Stratosphere

I started my walk down the strip with a quick stop at the Stratosphere.  It was my first time far off the strip in Las Vegas and it was odd to say the least. I don't get nervous walking the streets of Chicago but I was concerned more than once during my trip to and from the Stratosphere.

I took a cab to the Stratosphere which is pretty much directly between the Las Vegas strip and old Vegas. The cab like everything in Las Vegas,  more money than it needed to be. I originally planned to walk to old Vegas from the Stratosphere but the  cabbie highly suggested against it. The top of the Stratosphere is a great view of the strip. You can see directly down Las Vegas Blvd all the way to the end of the strip. At this point I was a little upset by the fact that I didn't have my Nikon 80-200 because I needed a little extra zoom. My Nikon 28-70 f2.8 worked out and the quick lens (f2.8) gave me just enough light to shoot at ISO 5000. It was also a challenge to shoot through the windows. There are a bunch of lights and reflections to deal with so I found myself getting creative to help minimize the reflections. Luckily there was also an outside area to shoot from.

The Mirage - Las Vegas

After the Stratosphere I walked back to the strip. It's quite a walk through an "interesting" part of Las Vegas. On my way back I started my journey photographing the Las Vegas strip. My goal was to shoot the buildings and try to capture their scale. I also found that there were many unique angles to shoot from using the skywalks and the walkways at various casinos.

Blue Ribbon Sushi Las Vegas

Overall it was an amazing trip. I wish I had more time to shoot Red Rock and the boneyard but I can save that adventure for another trip.

The Eiffel Tower Las Vegas


The Mini Beatles!

tags: Blue Ribbon Sushi Las Vegas, Las Vegas, Nevada, The Beatles, The Bellagio, The Las Vegas Strip, The Mirage, The Stratosphere, Treasure Island
categories: Uncategorized
Saturday 12.29.12
Posted by Thomas Campone
 

Napa Valley Sunrise Photography

Napa Valley Rainbow

I recently vacationed in beautiful Napa Valley, California, where I enjoyed plenty of wine tasting, and more importantly, capturing the scenery in photos. My last trip to Napa this past spring was a whirlwind trip that left me with only a few quick photo opportunities between vineyard visits; this time I had four full days to drag myself out of bed each morning to shoot - and the lack of sleep was well worth it! Not shockingly, the pure beauty of Napa Valley gave me just enough energy to get up each morning to take photos.

Napa Valley Sunrise - Day 1

Napa Valley Sunrise - Day 1

We stayed near downtown Napa which gave me easy access to the entire valley. Our rental house had an impressive, picturesque view which I knew would be my first shoot, but I still had to figure out where else I was going to shoot.  As we explored the valley I bookmarked each location that looked perfect for a sunrise shot and kept a tally on my phone. GPS makes for a great photo shoot assistant.

Napa Valley Sunrise - Day 1

Napa Valley - Silver Oak Vineyard

I'm in the process of buying a roller bag to accommodate all of my gear.  In the meantime I've been packing up my Lowepro AW250 with as much as I can, which forces me to choose favorite lenses as I can't fit my Nikon 28-70 f2.8 , Nikon 80-200 f2.8 and my wide angle in the bag at the same time. I opted to bring my wide angle lens and my Nikon 28-70 f2.8 this time, which proved to work out. There were times I would have liked to have my Nikon 80-200 f2.8, but that's life. The moral of the story: stop being cheap and get a rolling bag!

Napa Valley - BV Vineyard and Domain Carneros

Napa Valley - Inglenook Vineyard

Anyway, back to the adventure..... Day 1 and I'm up (amazingly) at 5:00 am. The sun is not up and I realized I made a slight miscalculation. Due to the mountain range the sun doesn't peak above the mountains until after sunrise. Luckily, the extra 20 minutes gave me time to make sure all the settings were ready to go on my Nikon D800, which I had forgotten being my first time shooting HDR since I got my D800. Settings... Check. Now it was time to play around with my new Lee Filter Set and my 0.9 ND Grad. Looks like I needed that extra time anyway.

Napa Valley - BV Vineyard

Napa Valley California

In a place like Napa Valley you can't help but feel like one with nature as you are surrounded by this lush intense beauty. As the sun started to approach the mountain line I just sat there admiring the whole process in awe and of coursing shooting the whole time.

Napa Valley - Palmaz Vineyard

Later that day we headed out on our wine tour.  We wound our way from vineyard to vineyard and stopped at some old and new favorites: Silver Oak , Inglenook, Beaulieu Vineyard and Palmaz Winery - bookmarking of course along the way.

Napa Valley - Palmaz Vineyard

Napa Valley - Inglenook Vineyard and BV Vineyard

Napa Valley California - Sunrise

Day 2 was definitely harder to get out of bed than Day 1, but today I had car keys and was ready to travel. I explored the north area of the valley, near Yountville and got some great morning shots. It's hard to look for locations while driving but luckily there aren't many people on the road at that time. Shooting in Napa is pretty amazing but it can also be a challenge since the light I prefer lasts only about 25 minutes this time of year.

Napa Valley - Palmaz Vineyard

Napa Valley California - Sunrise

The final two days I made my way over to the Domain Carneros area and explored the surrounding miles. Unfortunately, there was one location that I wanted to shoot but didn't have time to go to. Pride Mountain is breathtaking from what I hear so I was a little disappointing that I didn't get to see it or shoot any pictures. Judging from the shots I got and what will end up going in my portfolio I'd say this was a very successful trip. Now that I'm home I wish I was back; I see how people fall in love with California and never come home. I'll just have to hang some of my sunrise shots in my condo to remind me of those early morning adventures...

Napa Valley - Hog Island Oyster

Napa Valley California - Sunrise

Napa Valley California - Sunrise

Napa Valley California - Sunrise

Buy Now - $4.99
tags: Art, Beaulieu Vineyard, BV Vineyard, California, Chicago, Condo Art, Domain Carneros, HDR, Inglenook Vineyard, Mountains, Napa Valley, Palmaz Vineyard, Photography, Silver Oak Vineyard, Wine
categories: Uncategorized
Monday 12.10.12
Posted by Thomas Campone
 

Graceland Cemetery - Chicago

You don't think of cemeteries as beautiful places but in the heart of Chicago lies some of the most prime real estate and home to many of the most influential people of Chicago's past. This amazing and peaceful place is Graceland Cemetery located on Chicago's near north side. 2 weeks ago I headed over there to walk the grounds and to snap a few photos if the many mousoleumims and the rolling grounds. The plus side about the fall is that the leaves look are amazing colors and the sun rises later so you don't have to wake up at 5 am to catch dawn. Graceland Cemetery opens early but not too early so this is a great time of year to go. We got there as the sun was coming up so the light was perfect for this crisp fall day.

We were greeted by the security guard who informed us that tripods are strictly prohibited. Oh well, not a great start but a great day to be out none the less.

We headed right are the first fork in the road along the south end of the property. Not more than 5 minutes in to our walk we ran into this bright orange tree that must have been 100 years old. It was huge and still had almost all of its leaves. The leaves were burnt orange and the sun was shinning perfectly through the tree. We stopped for a few minutes almost in amazement alone.

Graceland Cemetery Chicago Not far from the first tree was a small hill with another large tombstone. Another tree had deposited its red leaves all over the hill next to the tombstone. I couldn't resist shooting the grave from below looking up at it. This gave the tombstone a grandness to it. The picture probably won't make the cut for anyone buying Chicago condo art but the colors and the scene make a great Halloween photo.

Graceland Cemetery Chicago

We kept walking around the south portion of the property and passed the tombs of Carter Harrison (ex mayor of Chicago) and Daniel Burnham (formed the Chicago plan and famous architect). We stumbled upon a lake near the end of the property. Between the calmness of the lake and the color of the trees it was a sight to be seen.

Graceland Cemetery Chicago

After we left the lake we circled back through the other half of the property on our way back to our car. Like I said before you probably won't get any condo art out of a place like Graceland Cemetery but the scenery and peacefulness are amazing.

Graceland Cemetery Chicago

tags: Autumn, Chicago, Chicago Condo Art, Fall, Graceland Cemetery, Sunrise
categories: Uncategorized
Monday 11.26.12
Posted by Thomas Campone
 

2012 Open House Chicago

This weekend I spent a few hours attending the 2012 Open House Chicago event. For those of you who aren't aware, Open House Chicago is an event where private areas that are normally off limits to the public are available for tours and pictures. 2011 was the inaugural event and I missed it partially because I didn't know what to expect. I was so amazed by some of the pictures I had seen from last years event that I knew I had to plan my route well before the Open House Chicago weekend.  

The Open House Chicago website has a map with all the participating locations. The website says that over 150 locations participated but the location of these buildings spread from the Rogers Park neighborhood down to Chinatown. I decided to stay in the loop area because they had some high profile buildings that I figured would have amazing views.

Views for the top of the Kemper Building

The first building we started at was the Drake Hotel. They had the Cape Cod Room available for tours.  The picture on the website showed the back of the Drake sign so I assumed that was the view from the Cape Cod Room. Not so much. The Cape Cod Room was on the first floor if not the basement of the Drake Hotel. We got there just as they were opening so we got to talk with the tour guide and she told us that just after Joe Dimaggio and Marilyn Monroe got married they had dinner there and carved their name in the bar. She also informed us Aretha Franklin dines there often and she always sits in one of the semi private rooms. The Cape Cod Room at the Drake was short on views but it was really cool to hear the history of the restaurant.

Next we headed over to the Kemper building. Apparently the Kemper building used to be the Unitrin building until last year. The building has a room on the 41st floor that used to be a restaurant with 360 degree views of the city.  Since the restaurant closed the top floor hasn't been open.  It's been over 40 years since it was open to the public. Because of where it is located you get spectacular views of the river, the jewelers building and many of the other Chicago landmarks. The only issue with this building was the massive reflections from all the people and other windows.  Even though it was a challenging place to shoot the views were well worth it.

After the Kemper building we headed over to the Chicago Tribune Tower. The Tribune Tower tour was of the board room and the office of the original president. From the board room there were some great views down Michigan Ave and amazing views of The Wrigley Building across the street. The shot of The Wrigley Building was the one that I had seen last year that convinced me that this was an event that I had to attend.

Next on the list was the First United Methodist Church across from Daley Plaza and the Picasso sculpture. The First United Methodist Church has a sanctuary near the top of the building (approximately 30 stories) that they actively use for worship. From the top of the building you could look down at the Picasso and Daley Plaza. It was a pretty amazing site to see and one of those "one of a kind" buildings.

The Open House Chicago event is what makes Chicago such an amazing city. I wish I could have seen more buildings but ill definitely put it on my calendar for next year. Enjoy the pictures!

tags: Chicago, Open House Chicago, The Kemper Building, The Wrigley Building, Tribune Tower
categories: Uncategorized
Sunday 10.14.12
Posted by Thomas Campone
 
Newer / Older

Powered by Squarespace.